Deploying LiteLLM and Langfuse Locally: Deploying complex applications like DB, LiteLLM, and Langfuse can be challenging, especially when working in local environments.
However, Docker simplifies this process by providing a consistent and isolated environment for development.
In this guide, we’ll walk you through the steps to deploy DB, LiteLLM, and Langfuse inside Docker containers on your local machine. Whether you’re a developer looking to streamline your workflow or a data scientist eager to experiment with these powerful tools, this tutorial will help you set up and run these applications with ease.
1. Register OpenAI models
To start with the gen AI model, you need to set up a model at your local or you can use a free account for your setup by creating an account below.
https://aistudio.google.com/app/apikey
2. Setup Database
In this step we are going to create Postgres container, to simplify the steps added username as myuser and password as mypassword.
Create Postgres Container
Execute below command to create DB container
docker run --name postgres \
             -e POSTGRES_PASSWORD=mypassword \
             -e POSTGRES_USER=myuser \
             -p 5432:5432 \
             -v pgdata:/var/lib/postgresql/data \
             -d postgres
Create Database
once the database is installed and ready in container. We will create 2 databases one for Lanfuse and another for LiteLLM. To Create follow the below steps.
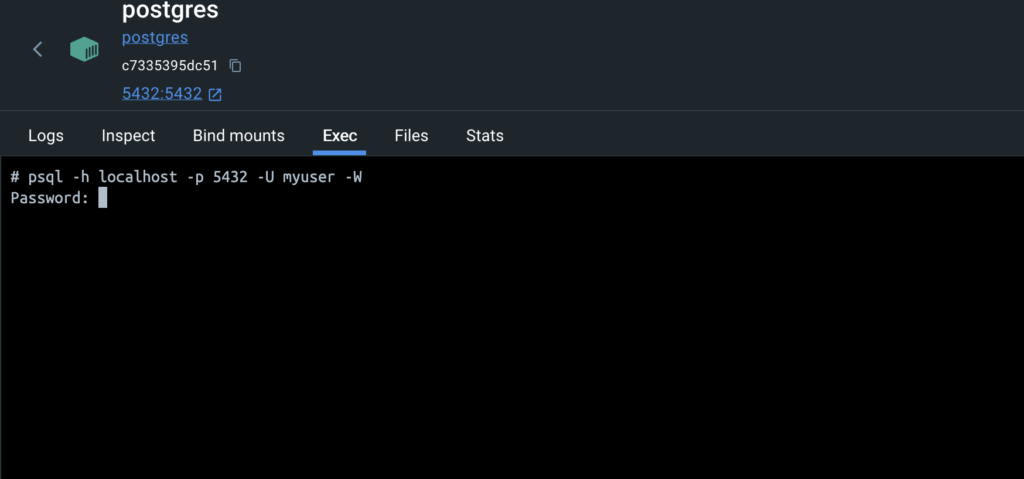
Go into the docker container and execute the below command also demonstrated in the image.
psql -h localhost -p 5432 -U myuser -Wabove command will prompt you to enter a password.
Once all done run below query to create db
CREATE DATABASE litellm_db;

CREATE DATABASE langfuse_db;
Read Also: Guide 101 : How to Write Effective Prompts
Postgres Container Internal IP
For a container to container, communication will require Internal IP
Get your db Container internal IP
docker inspect -f '{{range.NetworkSettings.Networks}}{{.IPAddress}}{{end}}' postgresIt will return your db container IP note this IP will be used in the below steps. in my case, it is 172.17.0.2
3. Setup Langfuse
Now we Move to the next steps for monitoring setup, lanfuse provides dashboard to visualize traces in detail and many more features it has.
Create Langfuse Container
let’s run the below command to create langfuse container and we are using db container internal IP here.
docker run --name langfuse \
-e DATABASE_URL=postgresql://myuser:mypassword@172.17.0.2:5432/langfuse_db \
-e NEXTAUTH_URL=http://localhost:3000 \
-e NEXTAUTH_SECRET=mysecret \
-e SALT=mysalt \
-p 3000:3000 \
-d langfuse/langfuse:latest
Langfuse Container Internal IP
check Langfuse container IP
docker inspect -f '{{range.NetworkSettings.Networks}}{{.IPAddress}}{{end}}' langfuseIn My case Lanfuse container IP is: 172.17.0.3 it will be used in the next steps
Test Langfuse
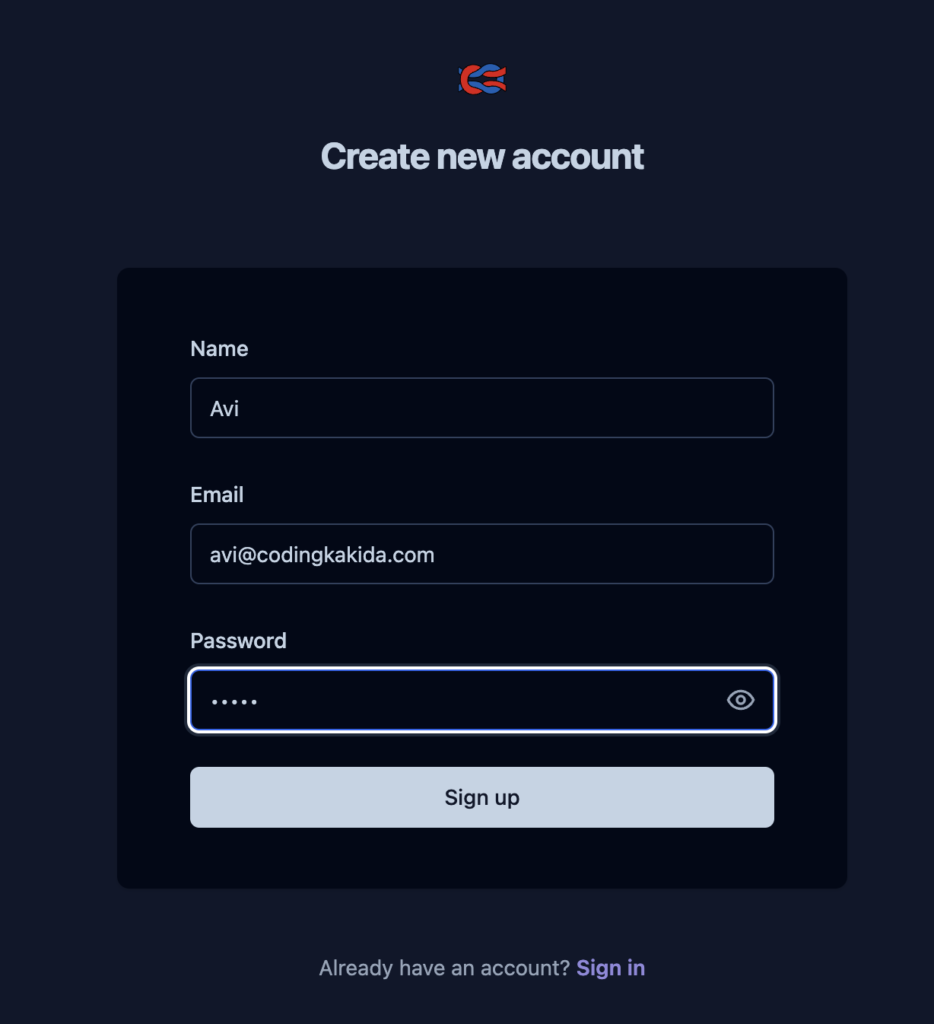
Now langfuse is ready and you can test on your http://localhost:3000.
First, you need to signup with any email id this will not ask for email verification.
Read Also: Creating Your Own Local ChatGPT-Like App Using HTML and JavaScript
Generate Keys
In the below Steps, you will require a public key and private key to send your traces to lanfuse so generate the public key and private key.
Go To Settings > Create New API Keys
4. Setup LiteLLM
Lite LLM acts as a proxy it will provide you one place for all your models you can also create teams assign keys and many more features it offers.
Create LiteLLM Config File
In this step will crate a config file where will place all our models and can provide more configuration but for now will keep it simple.
Prepare proxy_server_config.yaml
model_list:
  - model_name: local-gemini-latest
    litellm_params:
      model: gemini/gemini-1.5-flash
      api_key: AIzaSyCxfx74a1SDjBpMd-EeZIfhjhjOkSKQzhgfJl1
      api_base: https://generativelanguage.googleapis.com/v1beta/
      rpm: 1000
  - model_name: local-gpt
    litellm_params:
      model: openai/gpt-3.5-turbo
      api_base: https://openrouter.ai/api/v1/
      api_key: sk-or-v1-fb2221f360422cf2icdff3c4d04e93u6b93206c81c3e538a2dc70f80f9c198a1
Create LiteLLM Container
To crate this container we are using db internal IP and langfuse internal IP, also provide some environment variables that will required as initial setups like master key and store model in DB.
Run the below command to create a container for Litellm
docker run --name litellm \
    -v ./proxy_server_config.yaml:/app/config.yaml \
    -p 4000:4000 \
    -e DATABASE_URL=postgresql://myuser:mypassword@172.17.0.2:5432/litellm_db \
    -e LANGFUSE_HOST="http://172.17.0.3:3000" \
    -e STORE_MODEL_IN_DB="True" \
    -e LITELLM_MASTER_KEY="sk-1234" \
    ghcr.io/berriai/litellm:main-latest \
    --config /app/config.yaml --detailed_debug
Test Lite LLM
Now our litellm is ready and you can visit on http://localhost:4000. sign in with user as admin and in my case I have set the password as sk-1234.
5. Test
In this Step will test litllm and langfuse connectivity, for that add Langfuse Public and Private key for logging , Key which we have created in previous steps.
Langfuse Configuration In Lite LLM
Demonstrated in image how to add public key and private key
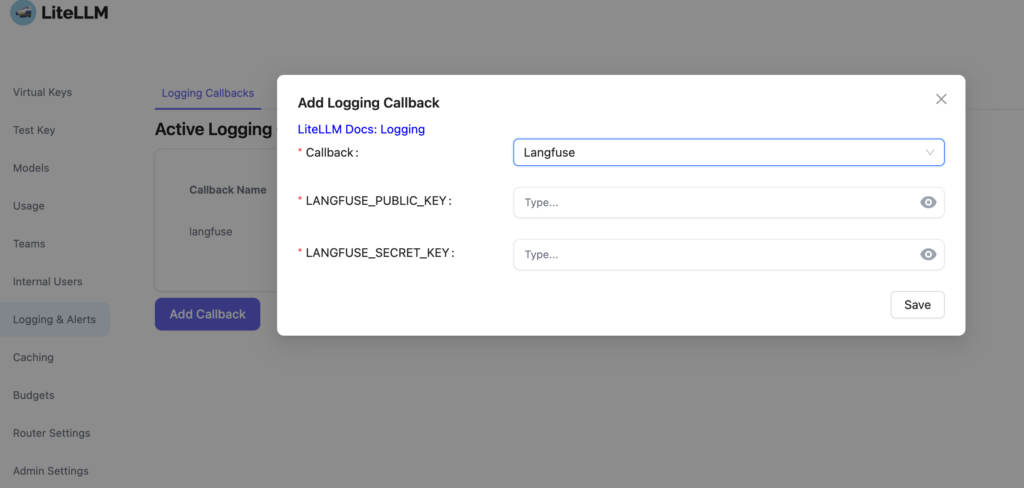
Test LiteLLM and Langfuse Connectivity
Once it is added click on the Test callback button, and you will get a successful health check message.

Test Trace Capture
Once COnfiguration is done you can check the trace in Langfuse also.

Conclusion: Deploying LiteLLM and Langfuse Locally
Deploying LiteLLM and Langfuse locally using Docker is a powerful way to create a consistent and manageable development environment.
By following the steps outlined in this guide, you can easily set up these tools in isolated containers, ensuring that your local environment mirrors production settings.
This not only streamlines your workflow but also reduces the risk of environment-related issues. Whether you’re experimenting with new configurations, running tests, or building complex applications, Docker provides the flexibility and reliability you need. Now that you have these components up and running, you’re well-equipped to explore their full potential in your projects.

Hey Tech Enthusiasts!
I’m Avinash, a passionate tech blogger with over 13+ years of experience in the trenches of software engineering.
You could say I’ve worn many hats in my journey – from full-stack developer crafting beautiful and functional applications to Solution Architect, designing the architecture for complex systems.
Over the years, I’ve delved into a vast arsenal of languages and tools, including the Generative AI (LLMs, LLM-Proxy, Observability, Prompt Engineering), .NET family (.NET, .NET Core), PHP, Rust, Python, the JavaScript frameworks (Angular, React, Node.js), and databases like MySQL, SQL Server, MongoDB.
As the cloud revolutionized our world, I’ve become well-versed in both Azure and GCP platforms, wielding Docker for containerization and CI/CD pipelines to streamline development workflows.
Here on my blog, I aim to share the knowledge I’ve accumulated and the lessons I’ve learned along the way. Whether you’re a seasoned developer or just starting your coding adventure, I want to provide you with insightful, practical articles that tackle real-world tech challenges.
Get ready to explore the latest advancements, delve into programming concepts, and discover efficient solutions to your development dilemmas. So, buckle up, tech enthusiasts – let’s embark on this exciting journey together!